Lovelies, Inspiration, and Encouragement

I’m not a huge shopper, or spender. I’m a saver and a minimalist (unless it involves fabric). Whatever… I’m cheap. But occasionally I’ll find some lovelies that even I can’t turn down, and I wanted to share them with you. And of course, since I try to avoid brick and mortar stores at all costs, these finds are almost always online.

15584077

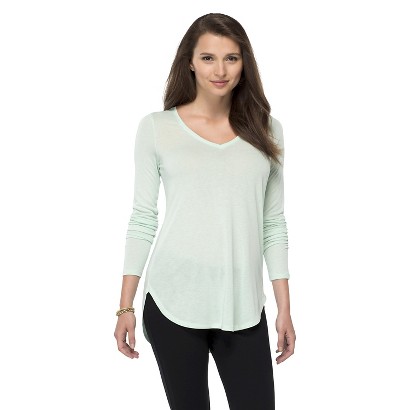
Mr. Right found me this shirt at Target. He’s so good at picking out clothes for me (random fact: he buys me clothes all the time, but I have only bought him one vest and one t-shirt in the history of our dating/marriage… because he’s super picky… God bless him).

target shirt

I love the shirt because it’s a neutral, it’s loose enough to be forgiving, and it’s longer in the back and covers my rear… which means I can wear it with leggings. My goal in life is to wear leggings as often as I can possibly get away with. As long as my hiney is covered. Because, well, ick.

DSC_3779-Version-2-e1397414938239

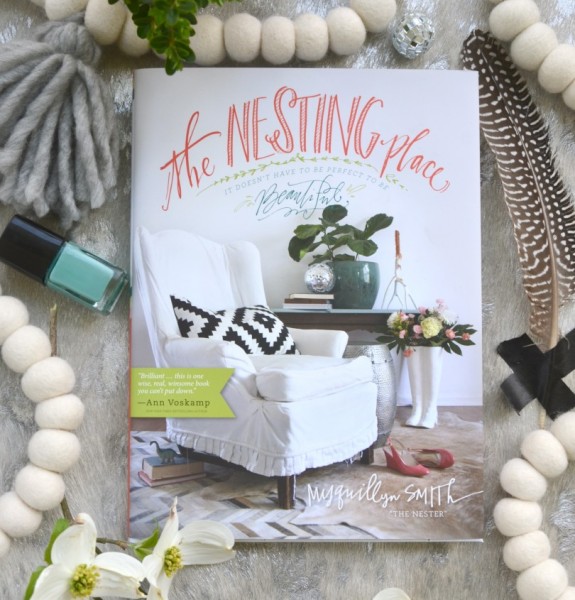
I have been reading this book, a Christian perspective on decorating. The gist: it’s okay to be imperfect. In fact, it’s preferred. It’s refreshing to this perfectionist’s soul… not to mention there are pretty pictures. And it has inspired me to do a ton of decorating in our house with stuff we already have, and selling tons of clutter on Facebook.

photo (87)

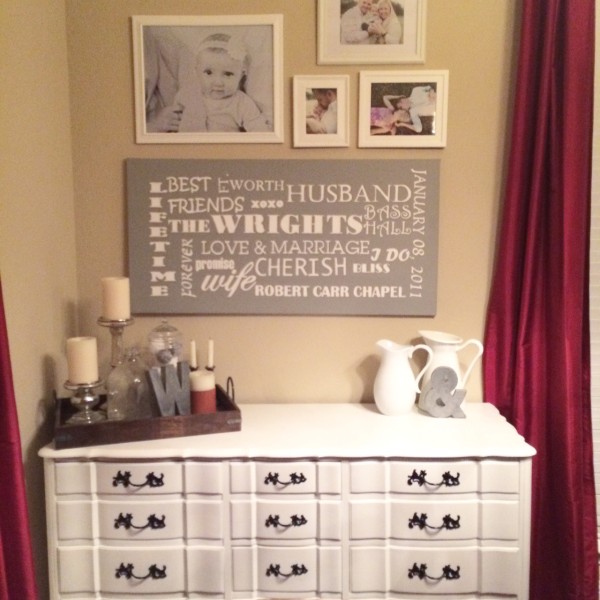
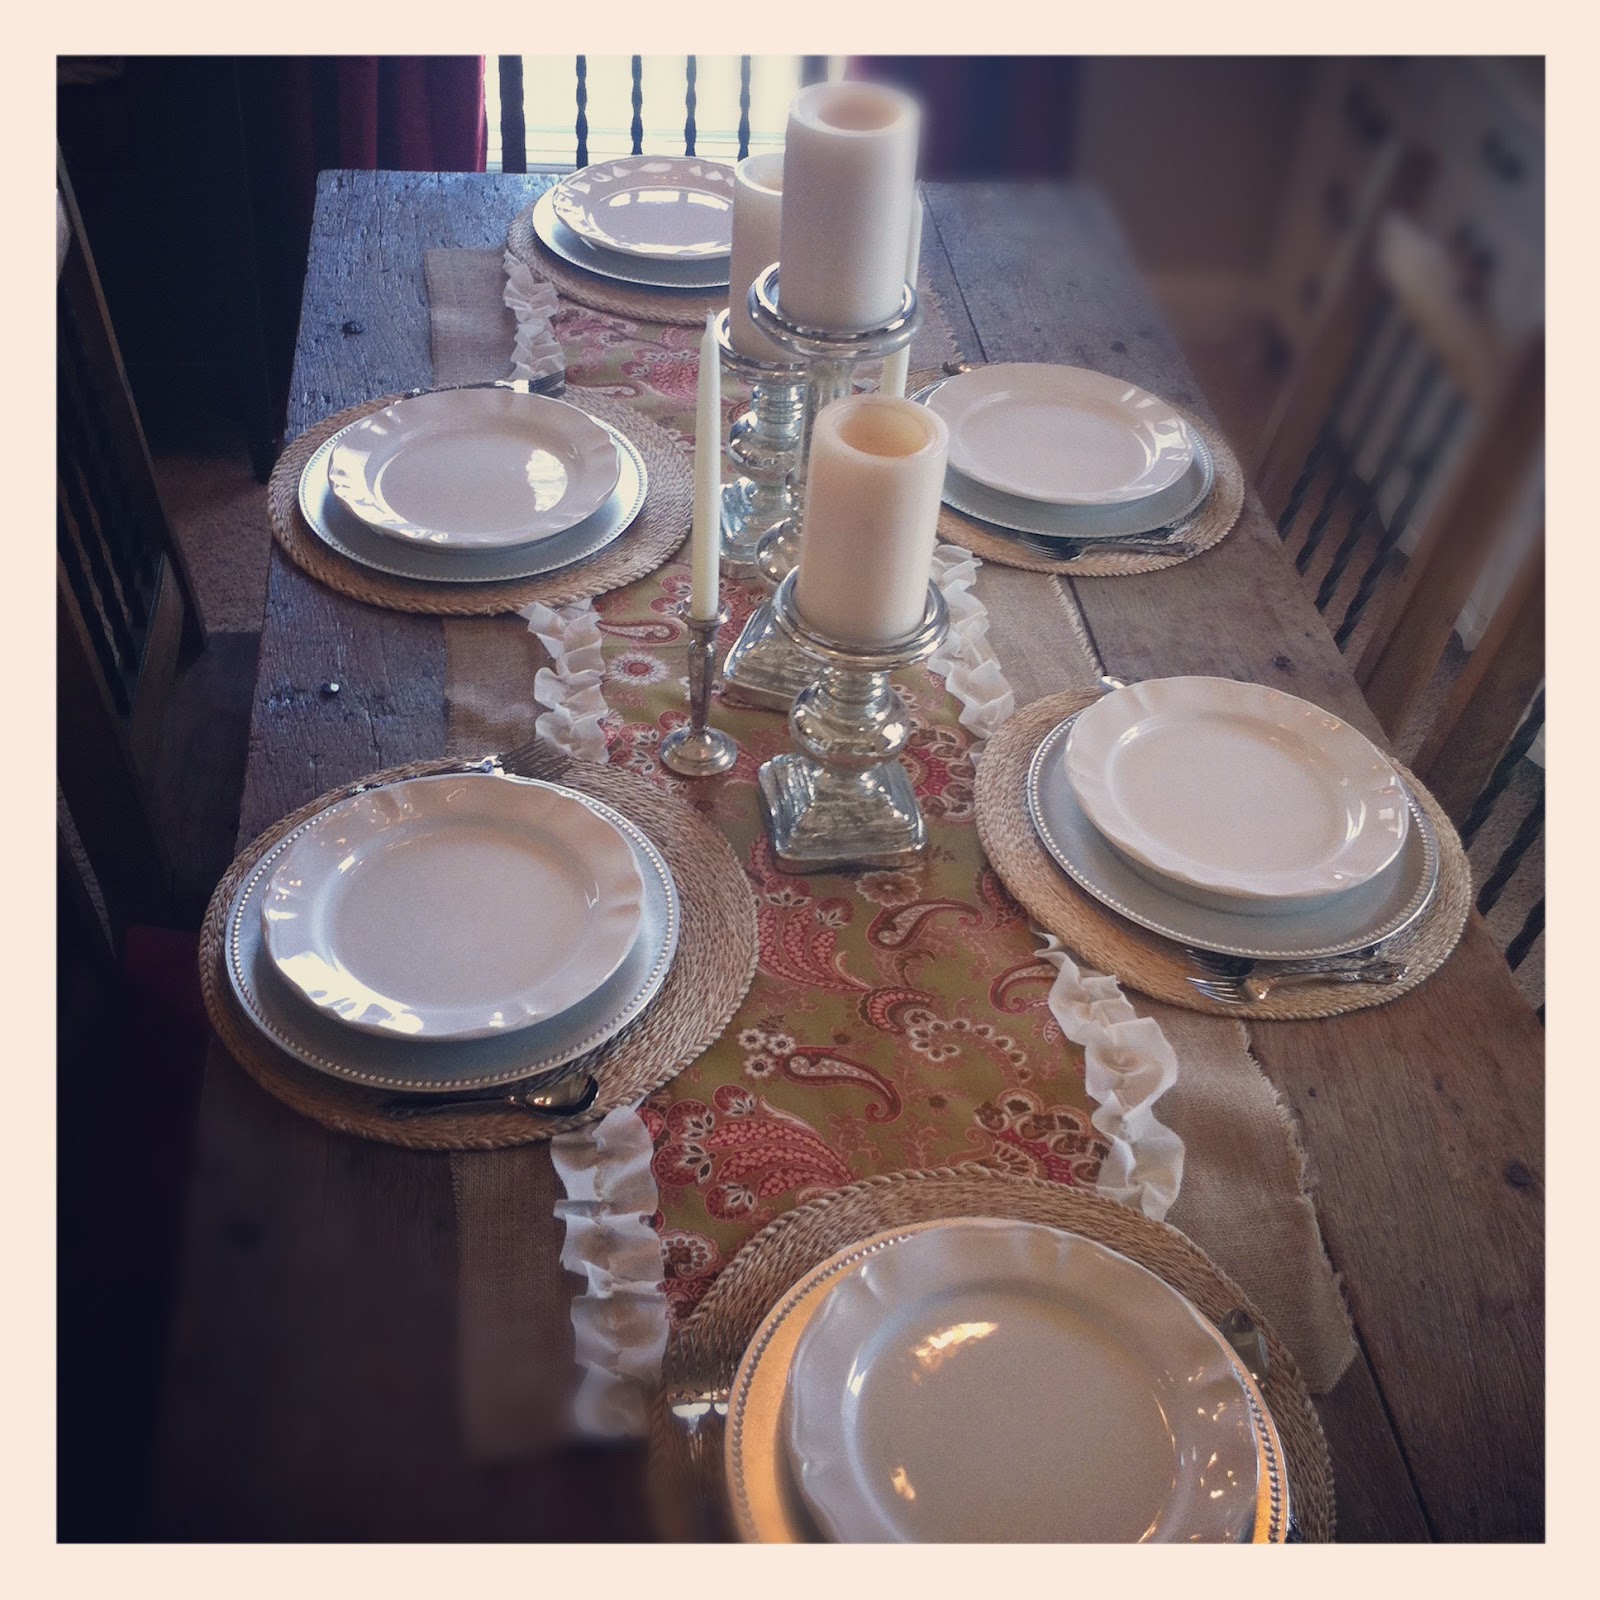
See above for evidence of my new desire to decorate with things we already have. I actually hung up pictures. The book teaches that decorating is all about enjoying things now and not waiting until you find the perfect item. Which has given me the freedom to just stick things on walls and table tops and tell myself that it’ll work until we figure out a more permanent plan. This happens to be in our dining room (we got that dresser for free and refinished it ourselves to turn it into a buffet that stores most of my tableware).

I’m pretty sure Mr. Right thinks I’ve lost my mind. I need to lend him the book. And if you look closely, there may or may not be 348 holes in that wall in our dining room. Whatever, we plan on repainting someday anyway. #reformedperfectionistil_570xN.711822817_5935

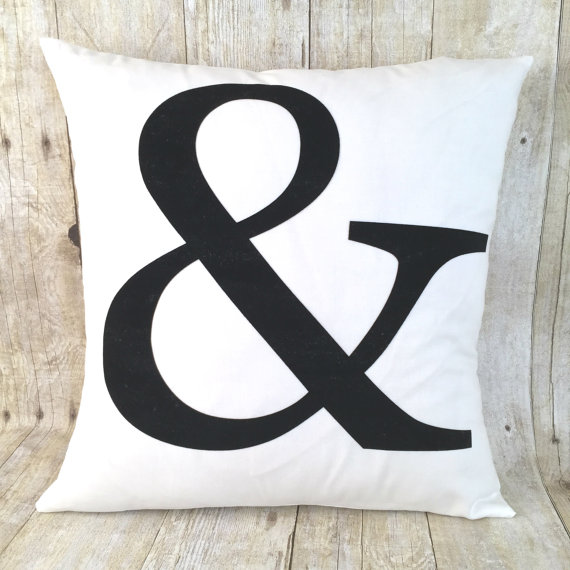
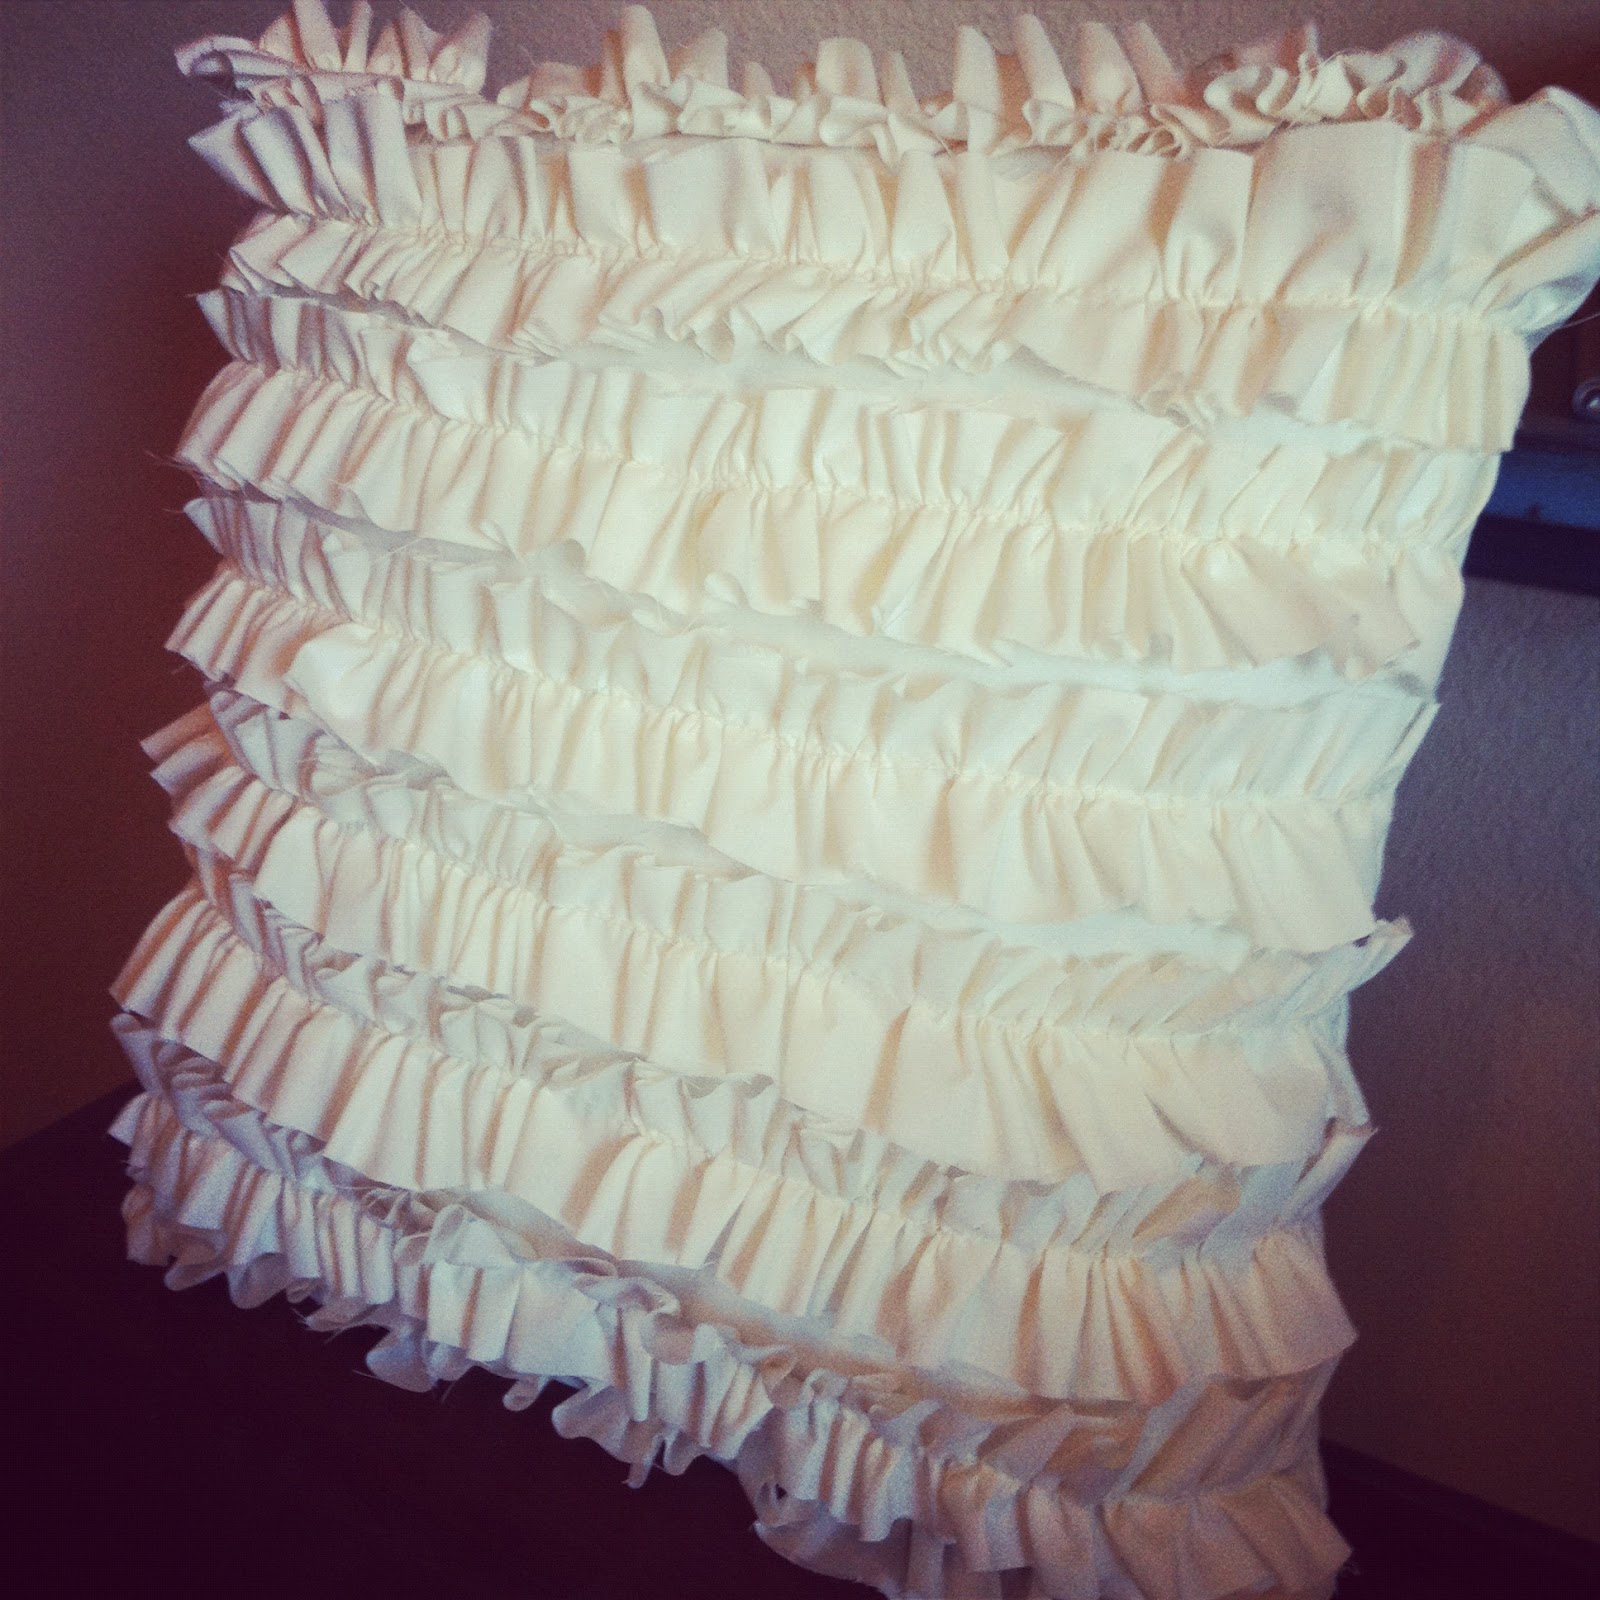
Speaking of decorating, I think this pillow would go perfectly in our bedroom. It’s just cool. (But let’s get real… it’s not in the budget… but maybe I can find an excuse to gift it to someone.)

9438
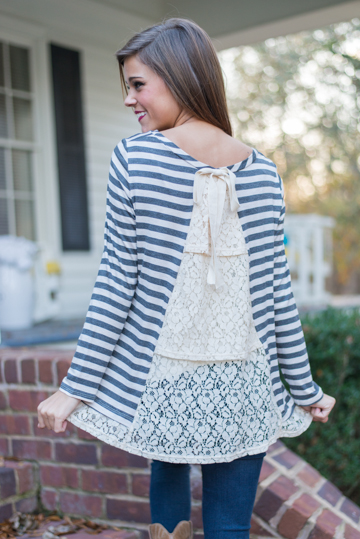
Mr. Right and my inlaws got me a gift certificate for Christmas to this online boutique. If you don’t follow them on Instagram, go do it now (@shopthemint). Everything I’ve ever bought from there has been just as cute in person, and a flattering fit. I got this striped shirt with the adorable lace back right after Christmas, and I may or may not have worn it every other day in the month of January. Because I’m an adult, and if I want to wear the same shirt over and over and over… I can do that. Go me.

LindsayLetters_BeKindSet_1024x1024

And finally, I want to be Lindsay Letters when I grow up. She is such an inspiration to me (not to mention I have one of her prints framed on my nightstand). I simply adore her work.

What are some of your favorite finds lately? I’d love it if you would share in the comments!

Also – don’t forget to enter my giveaway for the free Adopting Dallas t-shirt. Details and enter here.

———————————————-———————————————-

photo 1 (31)For prints and other lovelies, visit Texas Lovely on Etsy.

Other places you can find Texas Lovely:

On Facebook: www.facebook.com/texaslovelyshop
On Instagram: texas_lovely

First Birthday – Party Prep

bird day party - blog

Wrenn is turning ONE in two weeks. How is that possible? I swear just yesterday I was 800 months pregnant, lamenting to my husband that I would never go into labor, as I was stuck on the couch on bedrest, eating Chick-fil-a and binge-watching How I Met Your Mother on Netflix (y’all, Netflix got me through a very difficult pregnancy and the first two months of Wrenn’s life). And then my water broke, and next thing I knew, I was in the hospital holding my beautiful, big-eyed baby girl.

And now that beautiful, big-eyed baby girl is about to be ONE. ONE! We’ve decided to avoid the first birthday insanity and host a family-only birthday party with a simple dinner and cupcakes. But of course I had to design a special invitation and a FEW special decorating touches for the big day.

10346374_10152149422216120_7595591387987746695_n

It was only fitting that we declare this a BIRD-day party in honor of our little Wrenn-bird. We

found the idea a few months ago from a greeting card while on one of Mr. Right’s secret dates. The card had a bird with a crown and it simply said, “Happy BIRD-day.” From there, we spent the evening brainstorming fun ways to use this theme.

I’ve been on my best behavior and haven’t gone crazy buying decorations OR gifts, but I did decide that Wrenn would have to have a special birthday dress. I found this pattern on Etsy and did a practice run with scrap fabric (see photo) to make sure I could do it. I’m in love with the way it turned out! I’ve bought special BIRD-day fabric, and Wrenn will proudly debut her new dress at the party. (Lord, please don’t let her have a blow-out diaper in her new dress before the party starts!)

I can’t wait to fill you in on the rest of the details! Also, in the meantime, don’t forget about my little Etsy Shop! That shop helps fund my fabric addiction.

———————————————-———————————————-

PrintCheck out my newest print: Every Day I Love You.

Other places you can find Texas Lovely:

On Facebook: www.facebook.com/texaslovelyshop
On Instagram: texas_lovely

How to make an infinity scarf

As part of my Dream BIG goal for 2014, I’m trying to get out of my sewing comfort zone and learn to make new things. One of those things on my list was an infinity scarf. Seems simple enough – just a few straight edges – but thinking about how to have all of my seams on the inside and connecting the ends kind of makes my brain hurt. Geometry, math… these things are not my favorites.

But I did it… and I’m so happy with the outcome!

photo 1

I picked out some gorgeous fabric from JoAnn’s – don’t you just love the navy background with those beautiful flowers? Reminds me of spring.

I wanted my scarf to be full, so I didn’t cut it down but instead used the natural width of the fabric. If you wanted a slightly thinner scarf, you could trim it down by about half(ish).

I read through a written tutorial and THOUGHT I had it figured out, but there was one step I wasn’t super sure of. I just kind of made it up as I went. You have to sew everything inside out, and leave a tiny hole to then flip your fabric right side out. While it was inside out, I had the PERFECT infinity scarf. Amazing.

When I flipped it right side out?

photo 2

I had a giant pillowcase. Oops. No hole in the middle for your head. #infinityscarf #fail

So… I cut through one of the end seams and went with Plan B – a YouTube tutorial. (Thank goodness for YouTube.)

Ten minutes later, I had figured everything out and finished up my scarf. Total time for this project was less than an hour (it would have taken about 15 minutes if I had known what I was doing). I may never buy another scarf again – it’s way more fun to make my own!

photo 4

Since then I’ve worn it twice. And I love it so much I may sleep in it.

photo 5

———————————————-———————————————-

bow1Looking for baby bows and other lovelies? Visit Texas Lovely on Etsy.

Other places you can find Texas Lovely:

On Facebook: www.facebook.com/texaslovelyshop
On Instagram: texas_lovely

Baby leggings: An experiment

I only quilt. And make headbands. And pillows. But I do not EVER make clothes. I just don’t know how to.

Mr. Right says I’m a perfectionist who is scared to branch out and fail. I think he may be right. Or maybe it’s that I have a limited amount of sewing time, and I don’t want to waste it and my valuable fabric on failed projects.

But then Mr. Right found some pics of handmade baby leggings on Instagram, and I fell in love and knew I’d just have to figure it out. And that’s what I did, and I am so, SO proud!

I googled “baby legging tutorial” and found this super easy pattern. (Note to self – I want to try ALL of her tutorials.)

leggings1

Then Mr. Right and I went on a date to the Fabric store and found some ADORABLE fabrics in spandex and jersey. I have found that busy, random patterns are the most forgiving because you don’t have to line up seams or worry about having something upside down (the same goes for the backings on quilts).

I learned a few lessons the hard way:

1. I need chalk to trace my patterns. You know, black fabric + ink pen doesn’t really work. I ended up pinning the paper pattern to my fabric and just cutting carefully around it, which was fine for forgiving, stretchy material, but for another project that needed to be more exact, that would have caused problems. I’ve found sewing requires PERFECT measurements and cutting.

2. You can’t iron spandex, which made pressing the seams and hemming harder, but I worked around that by doing a lot of pinning.

3. My machine sucked that light, stretchy material right up, jamming my machine so badly I had to call in reinforcements in the form of a hunky husband with his tool belt. He saved the day and had me up and running within about 15 minutes, but I found that I had to be very careful not to do that again. Quilting with cotton is so much easier.

Other than that, the project was fairly easy. It took me about two hours from start to finish (I completed it during Wrenn’s naptime) and I loved the instant gratification of being able to dress her in her new leggings that same day. Quilts take me about 30 hours to make, so it’s usually at least a month of sewing (and that was pre-baby) before I get to admire the finished product.

leggings2

Wrenn LOVES her new leggings – she is fascinated with the shiny silver polka dots, and they’re so comfy. She may or may not have worn them Saturday night… and Sunday to church… and Monday to visit my office. And pooped on them twice (lot’s of laundry going on in this house).

I’m hooked, and have bought more fabric to make a few different pairs. And now I’m inspired to try some more baby clothes – I have a book of baby dress patterns that I’ve been avoiding, and I think I’m going to tackle it next and see what comes of it!

It feels good to try something new, doesn’t it?

———————————————-———————————————-

bow1Looking for baby bows and other lovelies? Visit Texas Lovely on Etsy.

Other places you can find Texas Lovely:

On Facebook: www.facebook.com/texaslovelyshop
On Instagram: texas_lovely

Our backyard becomes the victim of more nesting

As I mentioned in a previous post, Mr. Right has been nesting even more than me. I was really concerned with getting the nursery put together, which he so wonderfully helped me with (since I can’t paint, move heavy things, etc.), and once he finished that, he moved on to the backyard.

yard1

I came home from work one night to a surprise – he had finished building the pergola that we started last summer when we expanded our patio. Check out his handiwork – he did everything in one afternoon! My man is so talented when it comes to dreaming things up and then turning them into reality. While you’re at it, check out our monster urban garden he built last summer – we’re eating the best home-grown tomatoes in the whole world right now.

yard3

You’ll notice he also put twinkle lights above our table because, well, I have a weird obsession with twinkle lights. If I could, I’d leave Christmas lights on our house year-round, but then we’d be those neighbors (actually, sometimes I wonder if we already ARE those neighbors). The twinkle lights make a bit of a chandelier right over our table – It’s my favorite part!

yard2

Can you tell we don’t like to mow? We’ve slowly but surely filled our tiny backyard with flowers, patios, and vegetable gardens. One or two more summers and there won’t be a blade of grass anywhere to be seen!

And, while we’re at it, I thought I’d show you some other new additions, including our succulents (um, hello – succulent is code for cactus which is code for “okay if you forget to water for weeks at at time” – this is my new favorite plant!):

yard5

Another easy plant to keep alive is moss rose – and it blooms the most beautiful, colorful blooms. The only drawback is that it wilts every night, so if you’re hosting a lot of evening parties, it will look like you’ve got a dead plant. But during the day, it’s breathtaking. I’m also partial to hibiscus, which reminds me of Hawaii.

flowers

And then there’s our potted jalapenos, which I plan to wrap in bacon and cream cheese any day now. Yum.

yard6

We have tried to spend every cool evening sitting on our patio, soaking up the new place. It makes me feel like I’m on vacation in my own backyard. Thanks to my Mr. Right for dreaming up such a wonderful escape for us!

bethe2

My fall table

Fall is my favorite time of year – not just because it’s a celebration of surviving yet another sweltering Texas summer. Not just because it’s my birthday (Another year older? Didn’t I just have one of those?). Not just because it’s the World Series and the trees turn colors and my house is filled with orange pumpkins and brown burlap and I get to wear big baggy sweaters and tall boots. And it’s at least seven months before I have to wear a swimsuit.

Fall is my very favorite time of year, if you don’t count Christmas, the first time I can wear a sundress on a warm spring night, and anytime I get to eat chocolate. Or flat bread. Yes, fall is definitely in my top 5.

I’m not a big seasonal decoration girl, but I do enjoy decorating my table, since that’s where we spend a lot of our quality time. The fresh pumpkins and gourds are compliments of Trader Joe’s (it’s like Six Flags for girls like me who are scared of roller coasters), and the decorative (not real) pumpkins are from Market Street circa 2007.

Got any fall decorating tips for a girl on a budget who doesn’t like clutter? I’d love to hear them! Leave a comment, or link to your favorite blog post featuring some gorgeous (and practical) fall decor.

Decorating with Chalkboards

My mama kept a chalkboard in our kitchen when I was a child – we used it for shopping lists and spelling words and reminders. My dad taught my sister and I how to play softball by drawing diagrams on that chalkboard when I was in the third grade.

Who knew that my mom was absolutely ahead of her time when it came to decorating her house with chalkboards. For awhile I thought white boards were the wave of the future, but as usual, mama knew best.

Mr. Right and I are trying to carry the tradition to our own house by decorating with chalkboards. So far I have one in my laundry room:

And we’re pinching our pennies until we can turn this frame into a giant chalkboard/menu in our dining room. We tried to do it ourselves with plywood but it’s just too big, so we’ll be taking her to be professionally done at our local framing store. Soon. Until then it’s backed with burlap and I occasionally hang seasonal bunting on it to add a little color.

Until then, I continue to be inspired by some gorgeous DIY chalkboards I found online. (click on each picture to be taken to the original source)

Our marriage mentors have one of these in their kitchen that they post bible verses and prayer requests on. What a sweet way to keep the family on the same prayer page.

Or how about some chalkboard place mats?

A weekly menu (ps- don’t you love those green shelves?).

Chalkboards + bunting = bliss.

And then there’s this great endcap to a kitchen cabinet – perfect height for littles ones to enjoy. The second one is even cuter since it’s framed out.

 What about you? Have you found a unique way to use a chalkboard in your home or office? I’d love to hear about it.

Yellow & gray diamond baby quilt

My wedding colors were yellow and gray. My shop branding is yellow and gray. My never-ending yo yo quilt I’m making myself is yellow and gray. My last baby quilt was yellow and gray. My “You are my Sunshine” print is designed in yellow and gray. (Come to think of it, so is this one and that one).

So I’m sure you’re totally surprised that I finished yet ANOTHER yellow and gray baby quilt. What can I say? Those colors make me happy! And quilting is supposed to make you happy, which is why I keep going back to it. There will probably be more gray and yellow quilts in my future.

Say hello to my yellow and gray diamond baby quilt.

I continued with my streak of triangle quilts. As you can see there are so many different ways to arrange them to make them look completely different.

I didn’t have enough of that gorgeous gray fabric to finish the back, so I added two rows of patchwork squares with the same fabric as the front. I bound it with a retro yellow and gray border featuring tiny tulips. I’ve got a little bit leftover and can’t wait to use it again, it’s one of my new favorites.

I love how well you can see the quilted design on the back – such pretty diamonds!

I hand-bound the whole thing, which took me more hours than I’d like to admit (okay, at least 10), but it was worth it because of the delicate, clean lines it created.

This quilt is going to one of my Baylor Theta sisters, Amy, who just had another baby girl. I love getting to see babies use my quilts, as that’s what they’re created for – to be loved on, cuddled with, drug all over the house, and otherwise USED. I hope Baby Lily Reese gets much enjoyment over the next few years out of her little yellow and gray piece of my heart.

Stay tuned for ANOTHER quilt post TOMORROW. Yea!

Pillows

You know I love to quilt, but I’ve been looking for some quicker, less-expensive projects to serve as gifts (and who knows, maybe one day can go in an Etsy store to fund my fabric stash). I’ve had some ideas for pillows swimming around in my head for a year now, and finally had time between quilt projects to give two of them a try.

Ruffle My Feathers Pillow

Lately I’ve been obsessed with ruffles and this gal was easy-peasy. I just sewed up a stack of ruffles and then machine-stitched them onto a matching square of fabric. I used a light-weight cotton and hand-stitched it shut at the bottom. This became a birthday gift to a dear friend. 

We’ve Come Full Circle Pillow

This pillow was inspired by a set of pillows we got as wedding gifts from Crate & Barrel. Ever since I got it, I’ve wanted to recreate it on a smaller scale. I just took some felt I had leftover from making a Christmas wreath, used a few items I had laying around my sewing studio to trace the circles, and then hand-stitched them onto a matching square. Next time I do this I’ll probably do it on my machine, but I was a little worried that my free-motion quilting might be a bit wobbly on those little circles. 
I think I may make some in red and white, or green and white, for Christmas presents. They would be so cheerful!

DIY Ruffled Table Runner

Lately anytime I have a day off from work, I spend it locked in my craft room, creating things. 

It makes my heart so happy. 
Good Friday was no exception. I finished my nephew’s baby quilt A WHOLE WEEK EARLY. Typically I finish quilts around midnight the night before I give them away, but my sister’s baby shower isn’t until next weekend, so I had time to spare. This was my fastest quilt yet… I started it March 10 and finished it April 6. I can’t WAIT to show you pictures of this adorable quilt made from vintage baby fabrics and featuring some of the straightest lines I’ve ever sewn. It was like a quilting miracle. I think it’s my fancy new machine.
Now I just have to wait two more months until I can see Baby Luke use his new quilt. Gah, I am so excited to meet him.
But I digress… I finished the baby quilt and still had some spare time so I decided to whip up a spring table runner from some old burlap I found on sale last Christmas. I also had some old white linen ruffles lying around that were leftover from my ruffled Christmas tree decorations. 
I thought about sewing the ruffles on the ends of the burlap, but I felt like it needed more color. That’s when I found this gorgeous green and berry fabric from my stash that needed a good home. And so I did this:
To learn how to sew a ruffle, you can watch this video and look at the first technique. However, I only made one line of stitching on my ruffles instead of her two. (Shhh… don’t tell anybody but it was incredibly easy – but to impress folks we’ll act like it was really complicated.)
To make my table runner, I simply laid my patterned fabric over a wider burlap backing and then hand stitched the ruffle over the place where the two fabrics met, conveniently hiding the raw seams. My stitches were loose and messy, hidden by the very forgiving ruffle, and weren’t required to be very strong since it will simply sit on top of my table – durability isn’t a big deal. I could have sewn this on my machine but I didn’t want the rough burlap to dull my needle.
I then stitched my ruffle to the other side and frayed the edges of the burlap. About one hour after I started my project, I had this: 

It’s a perfect fit for our beloved rustic barn table. Pottery Barn has a similar table (but not as cool as ours) for almost $2,000. I think Mr. Right paid $100 for his. I fell in love with the table (which features a frame made from real oxen yokes and handmade chairs) even before I started dating him… and now I have both!
Sometimes you’re just lucky like that.